host-your-flutter-project-as-a-rest-api
Learn how to structure a Flutter project to reuse models and business logic across iOS, Android, Web, desktop platforms, and a REST API deployable to Google Cloud Run, enabling a single codebase for both client and server.
What this skill does
# Host your Flutter Project as a REST API
After you build your flutter project you may want to reuse the models and business logic from your lib folder. I will show you how to go about setting up the project to have iOS, Android, Web, Windows, MacOS, Linux and a REST API interface with one project. The REST API can also be deploy to Google Cloud Run for Dart everywhere.

> One Codebase for Client and Sever.
This will allow you to expose your Dart models as a REST API and run your business logic from your lib folder while the application runs the models as they are. [Here](https://github.com/rodydavis/shared_dart) is the final project.
## Setting Up
As with any Flutter project I am going to assume that you already have [Flutter](https://flutter.dev/) installed on your machine and that you can create a project. This is a intermediate level difficulty so read on if you are up to the challenge. You will also need to know the basics of [Docker](https://www.docker.com/).
## Why one project?
It may not be obvious but when building complex applications you will at some point have a server and an application that calls that server. [Firebase](https://firebase.google.com/) is an excellent option for doing this and I use it in almost all my projects. [Firebase Functions](https://firebase.google.com/products/functions/) are really powerful but you are limited by Javascript or Typescript. What if you could use the same packages that you are using in the Flutter project, or better yet what if they both used the same?

When you have a server project and a client project that communicate over a rest api or client sdk like Firebase then you will run into the problem that the server has models of objects stored and the client has models of the objects that are stored. This can lead to a serious mismatch when it changed without you knowing. GraphQL helps a lot with this since you define the model that you recieve. This approach allows your business logic to be always up to date for both the client and server.
## Client Setup
The first step is to just build your application. The only difference that we will make is keeping the UI and business logic separate. When starting out with Flutter it can be very easy to throw all the logic into the screen and calling setState when the data changes. Even the application when creating a new Flutter project does this. That's why [choosing a state management solution](https://flutter.dev/docs/development/data-and-backend/state-mgmt/options) is so important.
To make things clean and concise we will make 2 folders in our lib folder.
* ui for all Flutter Widgets and Screens
* src for all business logic, classes, models and utility functions
This will leave us with main.dart being only the entry point into our client application.
```
import 'package:flutter/material.dart';
import 'plugins/desktop/desktop.dart';
import 'ui/home/screen.dart';
void main() {
runApp(MyApp());
}
class MyApp extends StatelessWidget {
@override
Widget build(BuildContext context) {
return MaterialApp(
title: 'Flutter Demo',
theme: ThemeData.light(),
darkTheme: ThemeData.dark(),
home: HomeScreen(),
);
}
}
```
Let’s Start by making a tab bar for the 2 screens. Create a file in the folder ui/home/screen.dart and add the following:
```
import 'package:flutter/material.dart';
import '../counter/screen.dart';
import '../todo/screen.dart';
class HomeScreen extends StatefulWidget {
@override
_HomeScreenState createState() => _HomeScreenState();
}
class _HomeScreenState extends State<HomeScreen> {
int _currentIndex = 0;
@override
Widget build(BuildContext context) {
return Scaffold(
body: IndexedStack(
index: _currentIndex,
children: <Widget>[
CounterScreen(),
TodosScreen(),
],
),
bottomNavigationBar: BottomNavigationBar(
currentIndex: _currentIndex,
onTap: (val) {
if (mounted)
setState(() {
_currentIndex = val;
});
},
type: BottomNavigationBarType.fixed,
items: [
BottomNavigationBarItem(
icon: Icon(Icons.add),
title: Text('Counter'),
),
BottomNavigationBarItem(
icon: Icon(Icons.list),
title: Text('Todos'),
),
],
),
);
}
}
```
This is just a basic screen and should look very normal.
### Counter Example
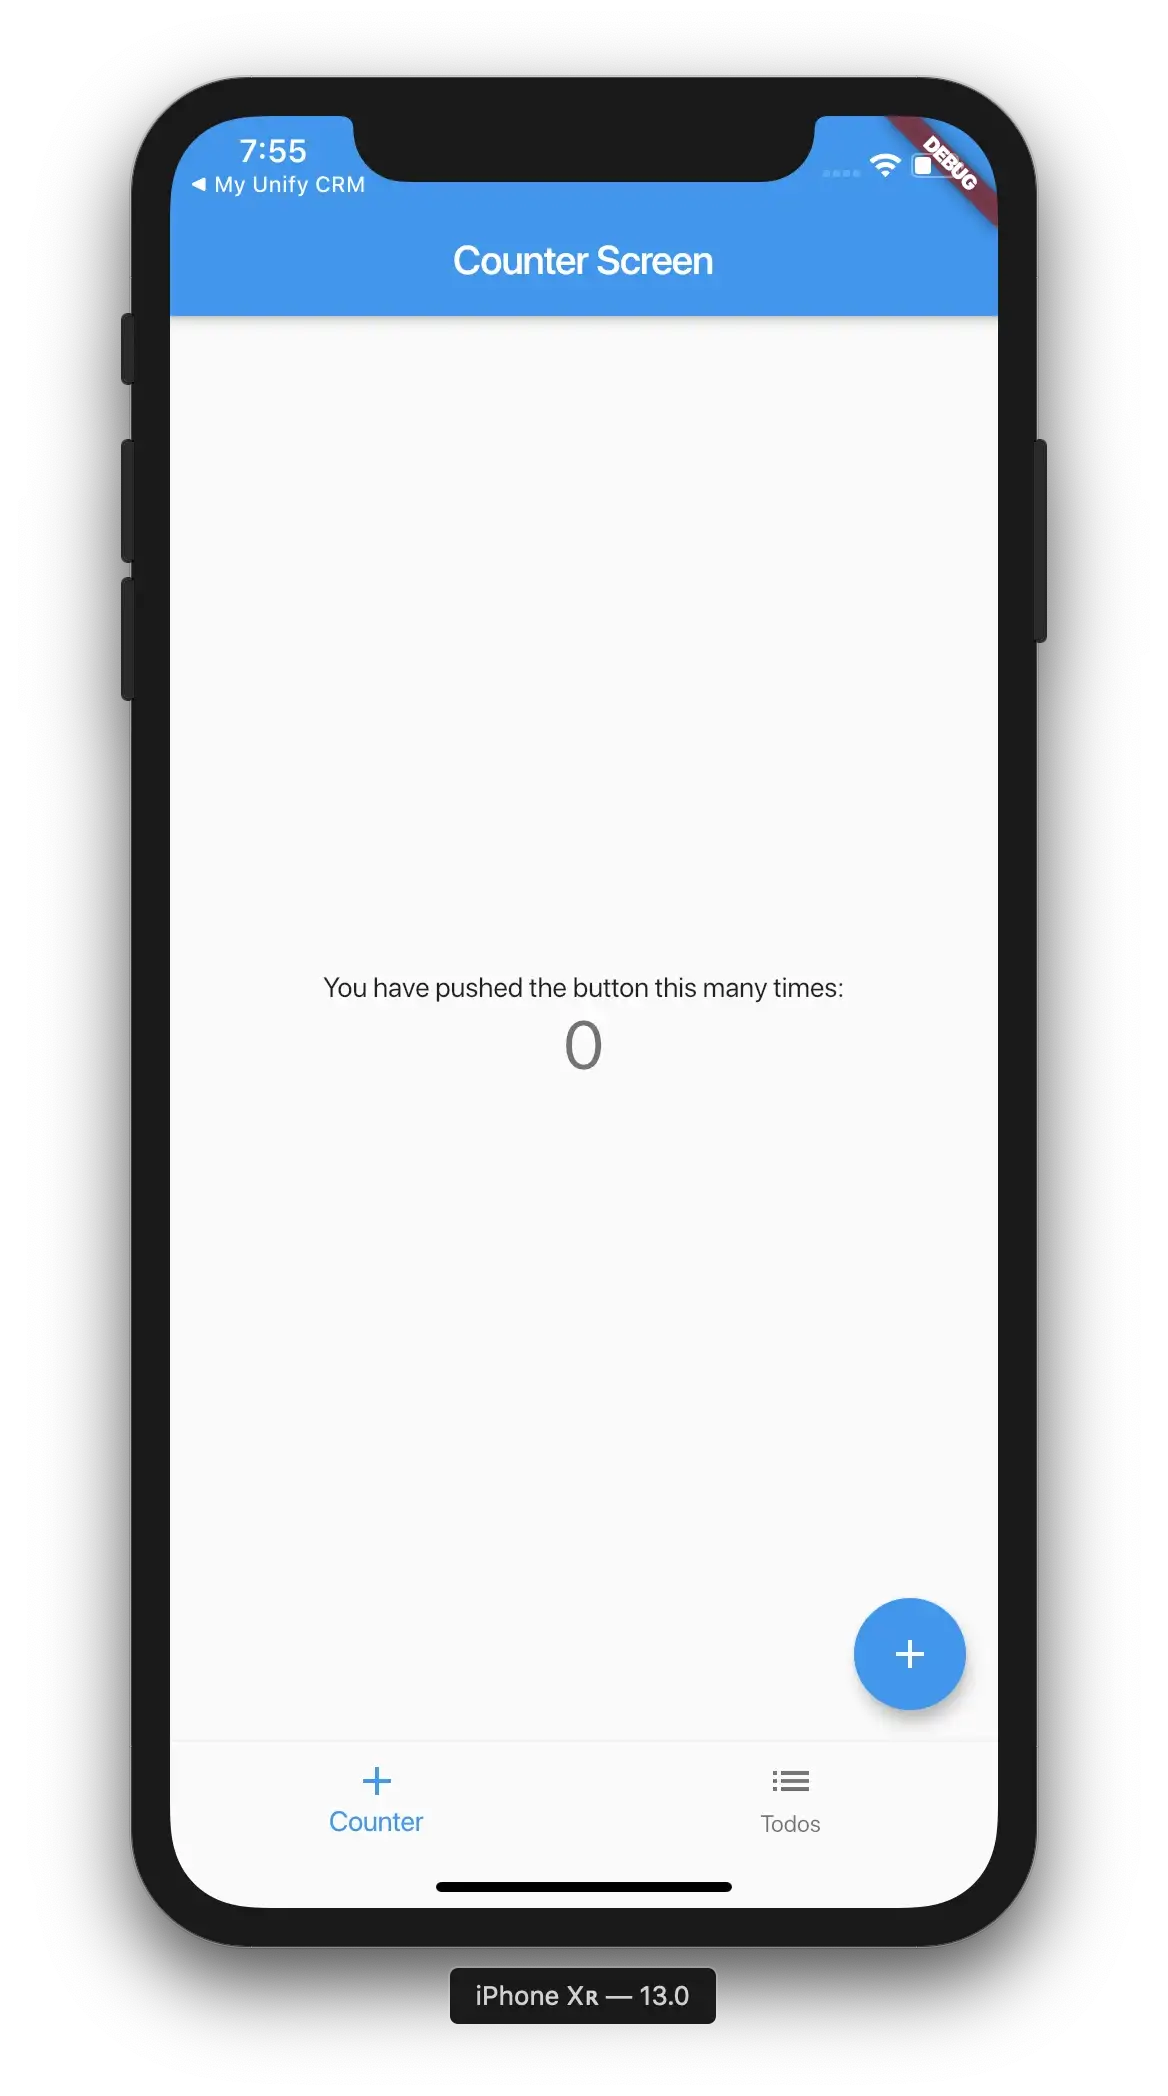
Now create a file ui/counter/screen.dart and add the following:
```
import 'package:flutter/material.dart';
import 'package:shared_dart/src/models/counter.dart';
class CounterScreen extends StatefulWidget {
@override
_CounterScreenState createState() => _CounterScreenState();
}
class _CounterScreenState extends State<CounterScreen> {
CounterModel _counterModel = CounterModel();
void _incrementCounter() {
setState(() {
// This call to setState tells the Flutter framework that something has
// changed in this State, which causes it to rerun the build method below
// so that the display can reflect the updated values. If we changed
// _counter without calling setState(), then the build method would not be
// called again, and so nothing would appear to happen.
_counterModel.add();
});
}
@override
Widget build(BuildContext context) {
// This method is rerun every time setState is called, for instance as done
// by the _incrementCounter method above.
//
// The Flutter framework has been optimized to make rerunning build methods
// fast, so that you can just rebuild anything that needs updating rather
// than having to individually change instances of widgets.
return Scaffold(
appBar: AppBar(
// Here we take the value from the MyCounterPage object that was created by
// the App.build method, and use it to set our appbar title.
title: Text('Counter Screen'),
),
body: Center(
// Center is a layout widget. It takes a single child and positions it
// in the middle of the parent.
child: Column(
// Column is also a layout widget. It takes a list of children and
// arranges them vertically. By default, it sizes itself to fit its
// children horizontally, and tries to be as tall as its parent.
//
// Invoke "debug painting" (press "p" in the console, choose the
// "Toggle Debug Paint" action from the Flutter Inspector in Android
// Studio, or the "Toggle Debug Paint" command in Visual Studio Code)
// to see the wireframe for each widget.
//
// Column has various properties to control how it sizes itself and
// how it positions its children. Here we use mainAxisAlignment to
// center the children vertically; the main axis here is the vertical
// axis because Columns are vertical (the cross axis would be
// horizontal).
mainAxisAlignment: MainAxisAlignment.center,
children: <Widget>[
Text(
'You have pushed the button this many times:',
),
Text(
'${_counterModel.count}',
style: Theme.of(context).textTheme.display1,
),
],
),
),
floatingActionButton: FloatingActionButton(
onPressed: _incrementCounter,
tooltip: 'Increment',
child: Icon(Icons.add),
), // This trailing comma makes auto-formatting nicer for build methods.
);
}
}
```
This is the default counter app you get when you create a FlRelated in Backend & APIs
jfrog
IncludedInteract with the JFrog Platform via the JFrog CLI and REST/GraphQL APIs. Use this skill when the user wants to manage Artifactory repositories, upload or download artifacts, manage builds, configure permissions, manage users and groups, work with access tokens, configure JFrog CLI servers, search artifacts, manage properties, set up replication, manage JFrog Projects, run security audits or scans, look up CVE details, query exposures scan results from JFrog Advanced Security, manage release bundles and lifecycle operations, aggregate or export platform data, or perform any JFrog Platform administration task. Also use when the user mentions jf, jfrog, artifactory, xray, distribution, evidence, apptrust, onemodel, graphql, workers, mission control, curation, advanced security, exposures, or any JFrog product name.
cupynumeric-migration-readiness
IncludedPre-migration readiness assessor for porting NumPy to cuPyNumeric. Use BEFORE substantial porting work begins when the user asks whether code will scale on GPU, whether they should migrate to cuPyNumeric, which NumPy patterns transfer cleanly, what must be refactored before porting, or mentions pre-port assessment, scaling analysis, or refactor planning. Inspect the user's source code, look up NumPy usage, cross-reference the cuPyNumeric API support manifest, and distinguish distributed-scaling-friendly patterns from blockers such as unsupported APIs, scalar synchronization, host round-trips, Python/object-heavy control flow, shape/data-dependent branching, and in-place mutation hazards. Produce a verdict of READY, LIGHT REFACTOR, SIGNIFICANT REFACTOR, or NOT RECOMMENDED, with concrete refactor pointers.
alibabacloud-data-agent-skill
IncludedInvoke Alibaba Cloud Apsara Data Agent for Analytics via CLI to perform natural language-driven data analysis on enterprise databases. Data Agent for Analytics is an intelligent data analysis agent developed by Alibaba Cloud Database team for enterprise users. It automatically completes requirement analysis, data understanding, analysis insights, and report generation based on natural language descriptions. This tool supports: discovering data resources (instances/databases/tables) managed in DMS, initiating query or deep analysis sessions, real-time progress tracking, and retrieving analysis conclusions and generated reports. Use this Skill when users need to query databases, analyze data trends, generate data reports, ask questions in natural language, or mention "Data Agent", "data analysis", "database query", "SQL analysis", "data insights".
token-optimizer
IncludedReduce OpenClaw token usage and API costs through smart model routing, heartbeat optimization, budget tracking, and native 2026.2.15 features (session pruning, bootstrap size limits, cache TTL alignment). Use when token costs are high, API rate limits are being hit, or hosting multiple agents at scale. The 4 executable scripts (context_optimizer, model_router, heartbeat_optimizer, token_tracker) are local-only — no network requests, no subprocess calls, no system modifications. Reference files (PROVIDERS.md, config-patches.json) document optional multi-provider strategies that require external API keys and network access if you choose to use them. See SECURITY.md for full breakdown.
resend-cli
IncludedUse this skill when the task is specifically about operating Resend from an AI agent, terminal session, or CI job via the official resend CLI: installing/authenticating the CLI, sending/listing/updating/cancelling emails, batch sends, domains and DNS, webhooks and local listeners, inbound receiving, contacts, topics, segments, broadcasts, templates, API keys, profiles, or debugging Resend CLI/API failures. Trigger on mentions of Resend CLI, `resend`, `resend doctor`, `resend emails send`, `resend domains`, `resend webhooks listen`, `resend emails receiving`, or agent-friendly terminal automation.
alibabacloud-odps-maxframe-coding
IncludedUse this skill for MaxFrame SDK development and documentation navigation on Alibaba Cloud MaxCompute (ODPS). Helps answer MaxFrame API, concept, official example, and supported pandas API questions; create data processing programs; read/write MaxCompute tables; debug jobs (remote or local); and build custom DPE runtime images. Trigger when users mention MaxFrame, MaxCompute with MaxFrame, ODPS table processing, DPE runtime, MaxFrame docs/examples, DataFrame/Tensor operations, or GPU runtime setup. Works for both English and Chinese queries about Alibaba Cloud data processing with MaxFrame.